by Sarra Zoghlami
For cost estimators who need to evaluate the cost of manufacturing a part before designing the mold, for part designers who want to make sure their part will be easy to manufacture, and for mold designers who want to avoid hot spots.
Introduction
The Feasibility project in SimForm is a Design For Manufacturing (DFM) tool that lets you conduct thermal analyses for your plastic parts prior to designing the corresponding mold.
You can use the feasibility project to:- Identify critical areas to cool in your plastic part.
- Evaluate the thermal performance of different plastic and mold materials.
- Estimate a realistic cooling time target for your part.
In this hands-on tutorial, you will explore SimForm’s capabilities using one of the sample models provided in the application to set up and run feasibility analyses to analyze the thermal performance of your plastic part.
Set Up and Run a Feasibility Analysis
For this example, you will create a new project and job to run a feasibility analysis for a plastic part using a sample model:
-
On the Projects page, click on the drop-down menu in front of Design Project to expand the project types list.

-
From the project types list, select Feasibility Project.
-
Click Feasibility project.

-
The Add Feasibility project window opens.
When you create a new Feasibility project, you redeem 3 credits from your credit balance. Each project allows you to simulate up to three different solves without using additional credits. -
In the Add Feasibility project window, type a meaningful name that identifies your part design, for example Mouse Shell.
-
Click ADD.
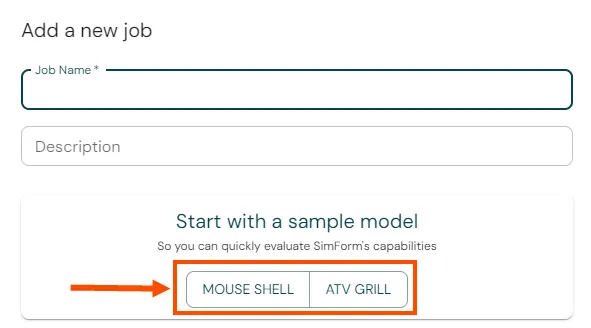
The Add a new job window opens. -
In the Add a new job window, select one of the sample models. For example, MOUSE SHELL.
-
In the Mold Material panel, expand the Select Material list and select a predefined mold material, for example, P20 Mold Steel.
You can also create a new customized material for the mold, using the procedure described in the Creating Custom Materials in SimForm article. SimForm assumes a well-designed mold in the selected material, taking into account the effect of the mold material on part quality and cooling time estimations. -
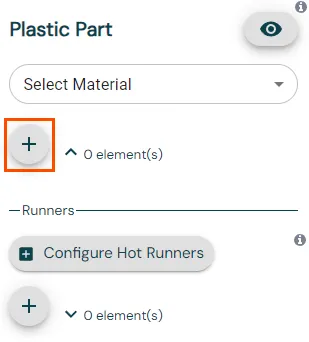
Graphically select the plastic part and click the + sign in the Plastic Part panel to define the plastic part.
-
In the Plastic Part panel, expand the Select Material list and select a predefined material, for example, Acrylonitrile Butadiene Styrene (ABS).
You can also create a new customized material for the plastic part, using the procedure described in the Creating Custom Materials in SimForm article.
The selection of the plastic part material sets the injection temperature of the plastic and the target mold temperature, which is based on the recommendations of the plastic provider. You can keep the default temperature based on the selected plastic material or modify it if necessary. -
Click Submit Job to solve your model.
View the Feasibility Analysis Results
- When the solve is finished, click Results to open the results page.

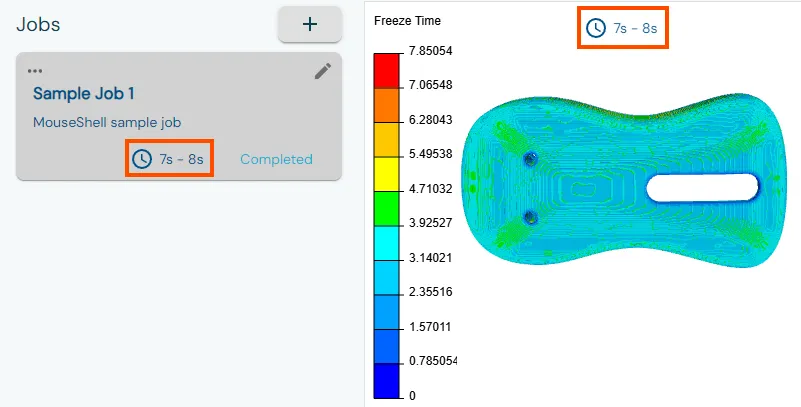
The freeze time results are displayed. The freeze time, or safe ejection time, is the duration for the plastic part to develop a thick enough solidified layer, ensuring safe ejection of the part while preserving its integrity. The overall freeze time, representing the shortest duration the part should spend in the mold before safe ejection, is displayed at the top of the model view window and in the job panel located in the left.
- Rotate the model to explore the local freeze time results in the plastic part.
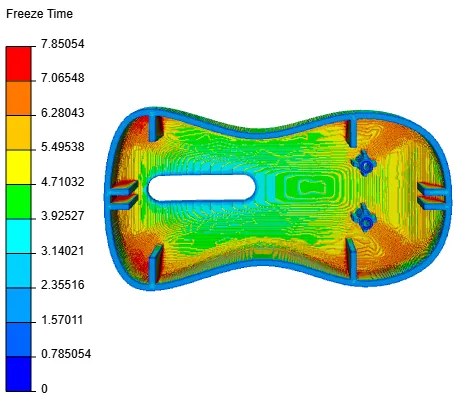
You can use the local freeze time results to identify areas that need a longer time to cool down. This helps you optimize your plastic parts, such as reducing the wall thickness, and improve the cooling system design, such as adding highly conductive inserts or adding baffles.
You can use the global freeze time to more accurately estimate the part cost for a quote, provide a realistic cycle time target for the mold maker, and compare your mold design cooling performance to a well-designed mold. - In the Display Mode panel, select Plastic Surface or Plastic Volume to display and inspect the temperature distribution of the plastic part on the surface or the volume, respectively.
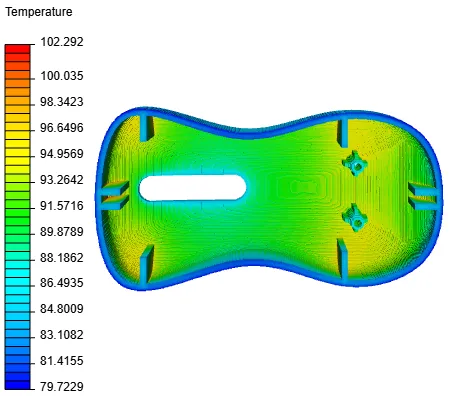
The surface temperature distribution shows that the high-temperature zones are in the inner surface of the plastic part.
You can use the temperature distribution results to identify potential problem areas such as hotspots and provide valuable feedback to part and mold designers. - Click anywhere in the plastic part to display its local results.
- Select Filter Plastic, then move the slider to set a minimum temperature limit for display. For example, 93°C.
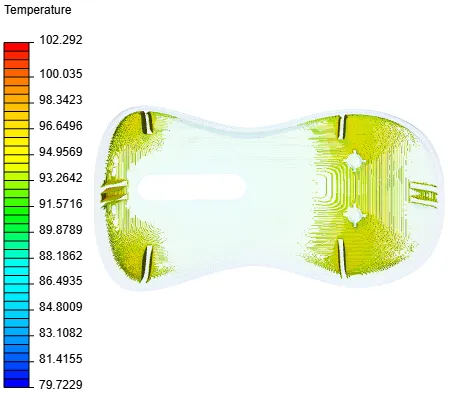
SimForm displays areas of the plastic part where the temperature is higher than the specified temperature.
This lets you identify the different areas of the plastic part: those that are within the safe ejection temperature range, those that are still in a liquid state, and those that exceed the melting point of the plastic material.
Conclusion
In this tutorial, you learned how to set up, solve, and analyze the thermal performance of a sample model using the Feasibility Project in SimForm. You can use feasibility analyses to optimize your plastic part and mold design process by estimating realistic cooling time cycles to determine reliable part cost estimates. You can also identify challenging cooling areas to make early design changes, and visually compare the actual mold design to an ideal design to identify areas for improvement to optimize manufacturing efficiency and improve part quality.