by Arnaud Divialle
This is part one of a two-part series. Part two is available here.
More than 80 percent of the plastic parts used in products today are injection-molded — a huge portion by any measure. Historically, the design of the molds that make these parts has been treated as an art as much as it is a science. A lot of trial and error, experiential instincts, and estimations drive the process, alongside industry rules of thumb and more exact data from tests.
This approach presents a problem, because plastic injection mold design is all about precision: creating a mold that can dependably and repeatedly produce untold quantities of durable plastic parts. But the process by which these molds are themselves created can be anything but precise. It often requires quite a lot of back-and-forth between molders, mold makers and part OEMs—and costly delays—before all parties are satisfied.
Of course, the knowledge and experience of skilled engineers and plastic injection mold designers go a long way to making it all work. But what if you could incorporate a tool at minimal expense that could eliminate some of the risk and inefficiencies—especially now that many of those experienced workers are retiring?
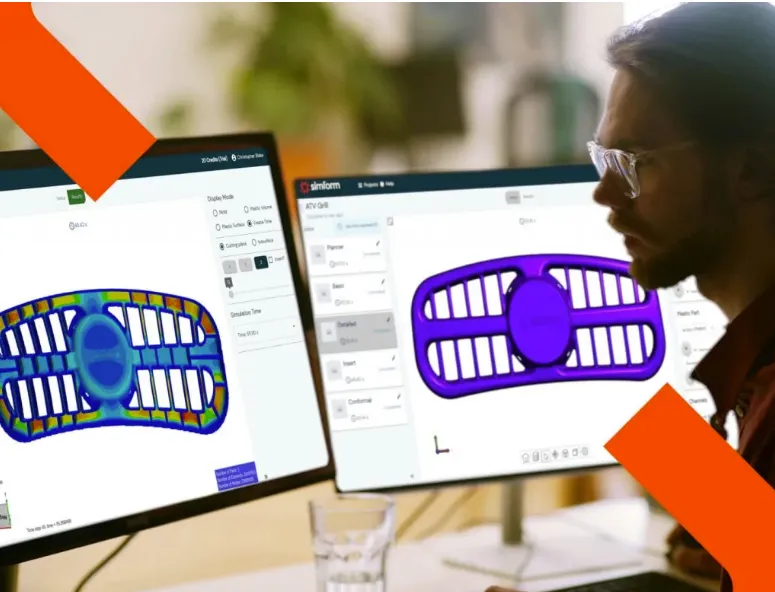
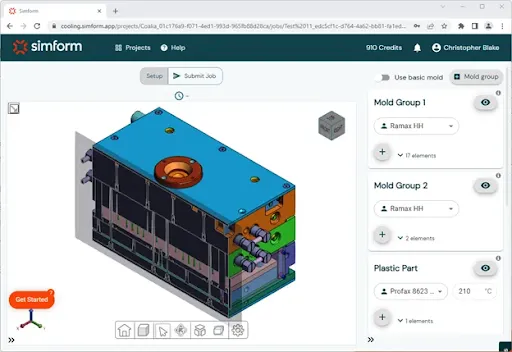
That’s why we created SimForm, making moldflow (cooling) analysis available to everyone involved in the design of injection molded plastic parts. But how can it help improve how molders and mold makers collaborate?
In this first of two blog posts, we provide a narrative of the three initial steps in injection molding tool design:
- The Standard Workflow of the industry today, based on more than 50 interviews over the past two years of industry players at every level; and
- The SimForm Workflow, which introduces front-end thermal simulation into the plastic injection mold design process

1. Pricing the part
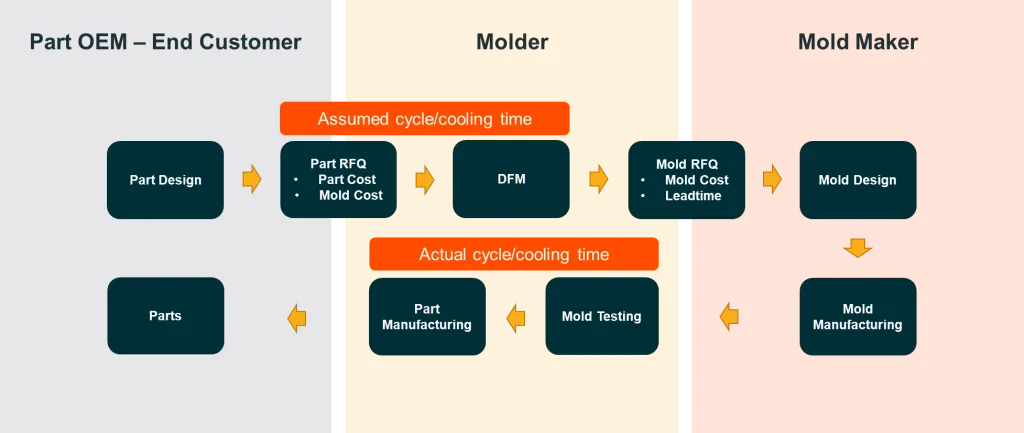
Paul has designed a new plastic part. His procurement department distributes a Request for Quote (RFQ) to several molders, one of which employs Ken, whose job is to estimate the part cost, including the cost of the mold, resin, secondary processes like part cleaning and assembly, and the part delivery lead time. One critical factor is the cycle time — how long it will take for a single part to be made properly, including the injection of molten plastic and, most crucially, cooling.
Ken relies on experience and some historical data to quote the work, using a series of assumptions, including the cycle time he needs the mold to not exceed if his company is to make a profit.
Later, with PO in hand, Ken seeks out a company to design the mold. Although it is key to his company’s profitability, his RFQ usually doesn’t include any cycle time requirements.
Over at one of Ken’s preferred mold makers, mold designer Danny works with Bob, his project manager, to estimate mold complexity, the design effort (and therefore development cost), and the manufacturing cost of the mold. They also estimate the cycle time of the mold, all of which Ken uses to update his financial planning: how much the mold will cost, how much the parts will cost, the profit per part, etc. Despite having to work with unreliable data, Ken has to commit to a cycle time to get to a part price.
Standard Workflow: Danny’s cycle time estimate is based on experience, but they provide it to Ken without any commitment — at this stage, there is too much uncertainty. This often leads to problems during mold trials, where the mold must somehow meet a quoted cycle time it was never designed to achieve. That can put heavy and unnecessary pressure on the master molder to deliver against unrealistic expectations.

SimForm Workflow: The simplicity of SimForm enables any of the stakeholders to use it, even before the mold is designed. Combining their experience and SimForm results, Danny and Bob can more reliably estimate the cycle time. This provides their client Ken with a higher degree of certainty and reduces his warranty risk, improving the mold maker’s value and business relationship with him.
2. Finalizing the part design
The mold designer often recommends modifications to the part to reduce its cost and make the mold design more cost effective. In some cases, their quote is conditional on those changes.
Standard Workflow: Danny sends these requests to Ken, who shares them with Paul at the OEM, but Danny struggles to justify his requests because they are based on experiential knowledge from years of plastic injection mold design, not hard data. Long delays ensue as three or four iterations occur between OEM part designer and the molder before a design is agreed upon.

SimForm Workflow: Danny’s recommendations as the mold designer are backed up by objective and quantified results that reduce the number of design iterations. The OEM achieves shorter time to market, elevating the role of Danny’s customer, the molder, in the value chain. In addition, because the molder can deliver specific and tangible recommendations, they can offer part modification recommendations as paid services.
3. Detailed mold design
With the design of the part complete, now comes what can be a tricky process of designing the mold that will produce that part.
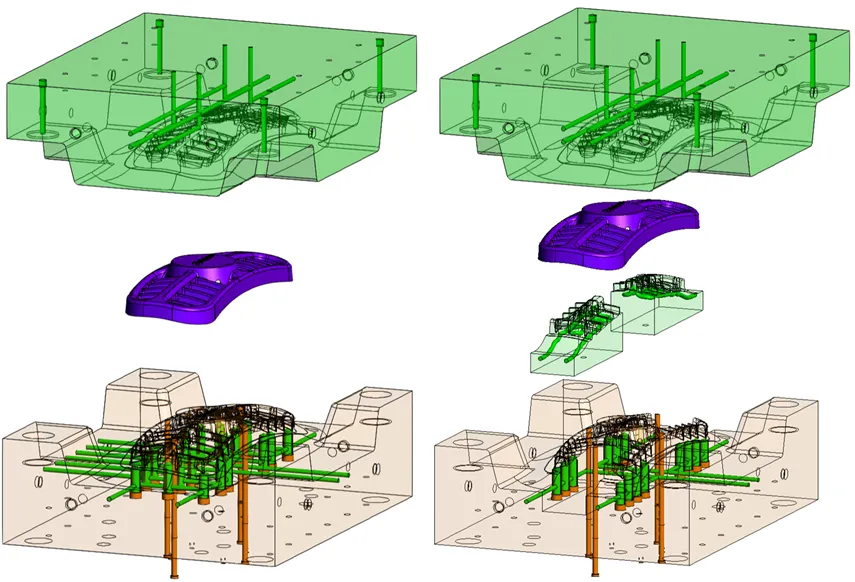
Standard Workflow: Danny starts the mold design with where to position the gates, sprue, sliders, ejection pins, etc. Next, Danny adds the mold cooling lines in whatever space remains, based on his prior experience. Danny then conducts a design review with Ken, who relies on his technical team to catch any issues that could extend the cycle time and reduce profitability. They potentially request some mold design changes, but if Danny has a different view, he has no hard data to defend his reasoning.

SimForm Workflow: Danny starts with a “planner” evaluation from SimForm to first identify the areas where they should avoid putting the mold mechanism. Then he continues with the mechanism design, accounting for the “keep out” areas defined by SimForm.
He adds cooling lines in the reserved space based on SimForm channel analysis, which optimizes cooling strategies, leading to improved part quality & reduced cost (due to shorter cycle time). The scientific thermal simulation reduces guesswork, as well as development time and cost.
The design review with Ken the molder also goes more smoothly. Should Ken and his technical team request design changes, Danny and Ken are able to easily and/or quickly perform “what if” scenarios and quantify the impacts of the changes requested, making it easier for Ken and Danny to agree on the best design. All of this supports more rapid development of molds that have shorter cycle times and more uniform temperature properties.
In our second post, we will conclude our narrative on designing for injection molding, with an exploration of how front-end thermal simulations have reduced risks and potential delays in the optimization, verification, manufacturing, setup and delivery phases.
To discover for yourself the benefits of early and rapid thermal simulation in plastic injection mold design, get your free trial of SimForm today.